|
Happy 2016! The new year brings renewed energy and resolve to get fit, lose weight, or adopt healthier behaviors. Your friends at Nen Daiko would like to share ways we warm up before taiko practice. We chose three exercises that give you both a physical and mental workout and hope that practicing these will help you stretch your mind and body. Shoyu CupsThis is an excellent full body stretching exercise. Imagine you are holding two cups of shoyu (that would be very messy if you spill!). The goal is to keep the “cups” upright at all times. Lead with both hands, lean forward, bring your hands out and overhead while leaning back and keeping your palms upright, and then start again. You should feel a good stretch all over (arms, legs, back, etc.). If you master this one, you can try it from each side as well. (Challenge: Try this with cups filled with actual shoyu or water!)  Miyake StretchMiyake Taiko, formally called “Miyake-jima Kamitsuki Mikoshi Daiko” is a traditional style from Miyake Island. The piece involves a specific style of movement from side to side. To prepare for this style of playing, we do this exercise - think of a side lunge and move from left to right keeping your head at the same level. The lower you can go (so your thighs are parallel to the ground), the more your quadriceps will feel it! The slow movement takes eight beats to one side and back to center, so that two rounds of eight counts will take care of each side. For the faster movement, each beat is one side, so that is 16 counts (8 on the right, 8 on the left). We typically go around the circle and have each person count to eight twice first for the slow movement, and then for the fast movement. If all 15 people are at practice, we do this one for a while! (Challenge: Try to keep your thighs parallel to the ground)  Opposing Arm SwingsThis is always a fun exercise to watch because you can see the thinking.
One way to describe it is to imagine a clock in a diagonal position from each outstretched arm. If you do an arm circle first, this might make some sense. Both arms will first go clockwise and then counterclockwise, then back to clockwise, then back to counter-clockwise. It is also helpful if you bend your knees when both arms reach the down position. (Challenge: Use a metronome and work up to a faster speed) 
0 Comments
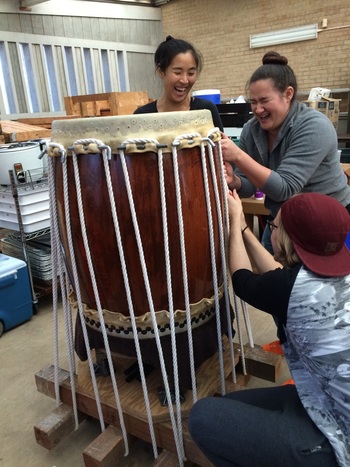
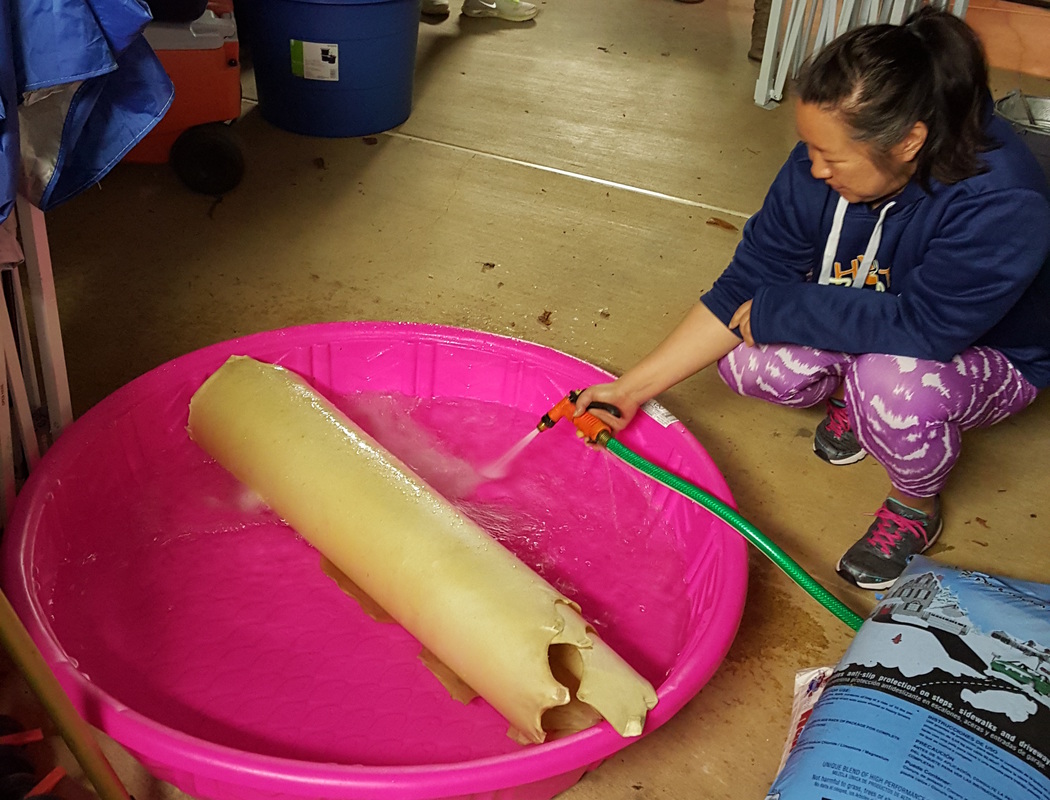
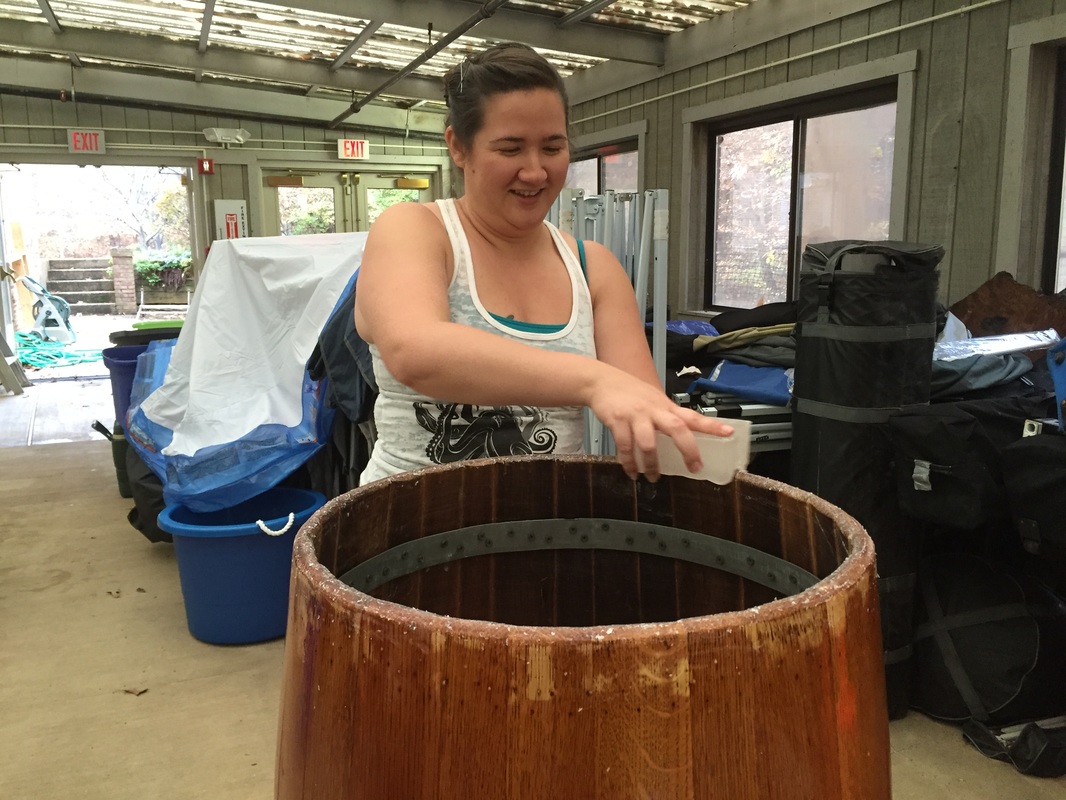
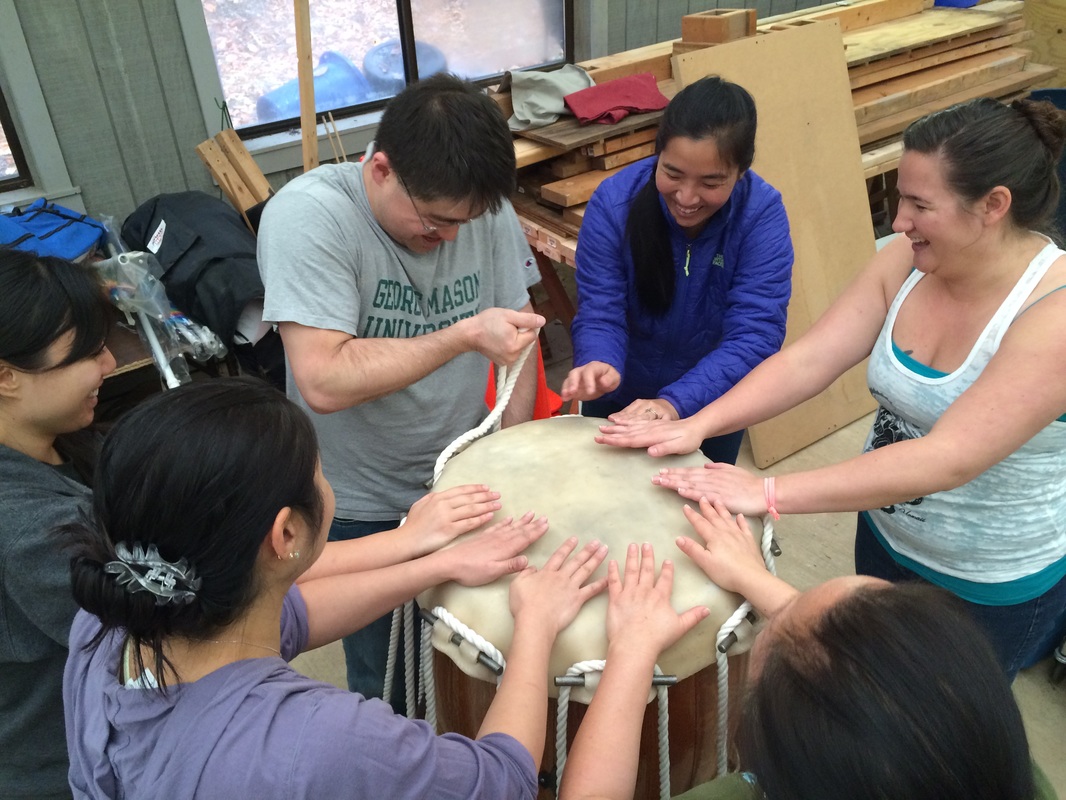
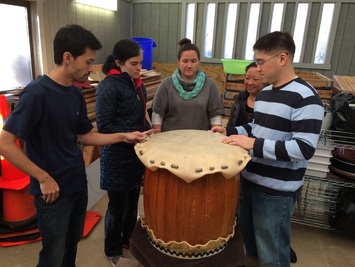
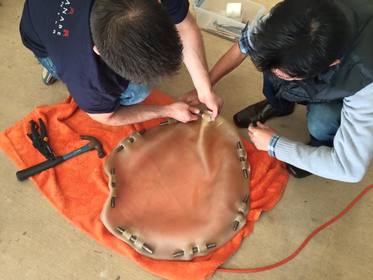
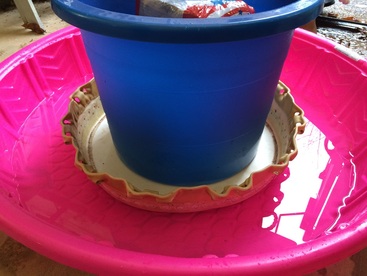 This fall, Nen Daiko took on some major drum maintenance projects. This blog is about how we restretched the cow hide on one of our large drums, or o-daiko, to improve its sound. To read about the reheading process of our chu-daiko or medium drum, click here. We removed the old head not because it was damaged, but because it had become loose and did not make a good sound anymore. Since the hide was thick and in otherwise good condition, we decided to reuse the head by stretching it tighter. There were stain marks from the old tacks or byo, but we thought it was worth it. We soaked the old o-daiko head, but kept the “mimi” or the “ears” of the taiko head dry. The mimi is an area of reinforced hide around the rim where we put a lot of force during stretching, so keeping the area dry and strong is critical. We put the drum head in the baby swimming pool with a few inches of water, weighed down by a bucket. We tried to scrub off the circular stains from the old byo, first with water, then with rubbing alcohol and a toothbrush, but that did nothing. Since it was only an aesthetic issue, we decided not to worry about it. Since the head was already in the right shape, it didn’t take long to thread the metal rods through the mimi, wrap the rope around the drum, and secure the head on the o-daiko. This is a very solemn and serious process, as you can see!
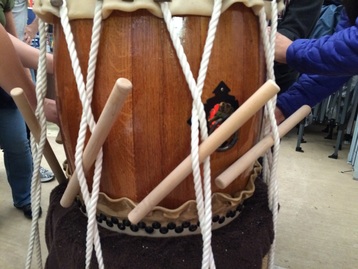
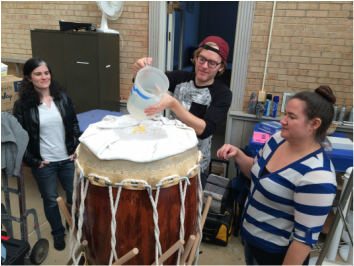
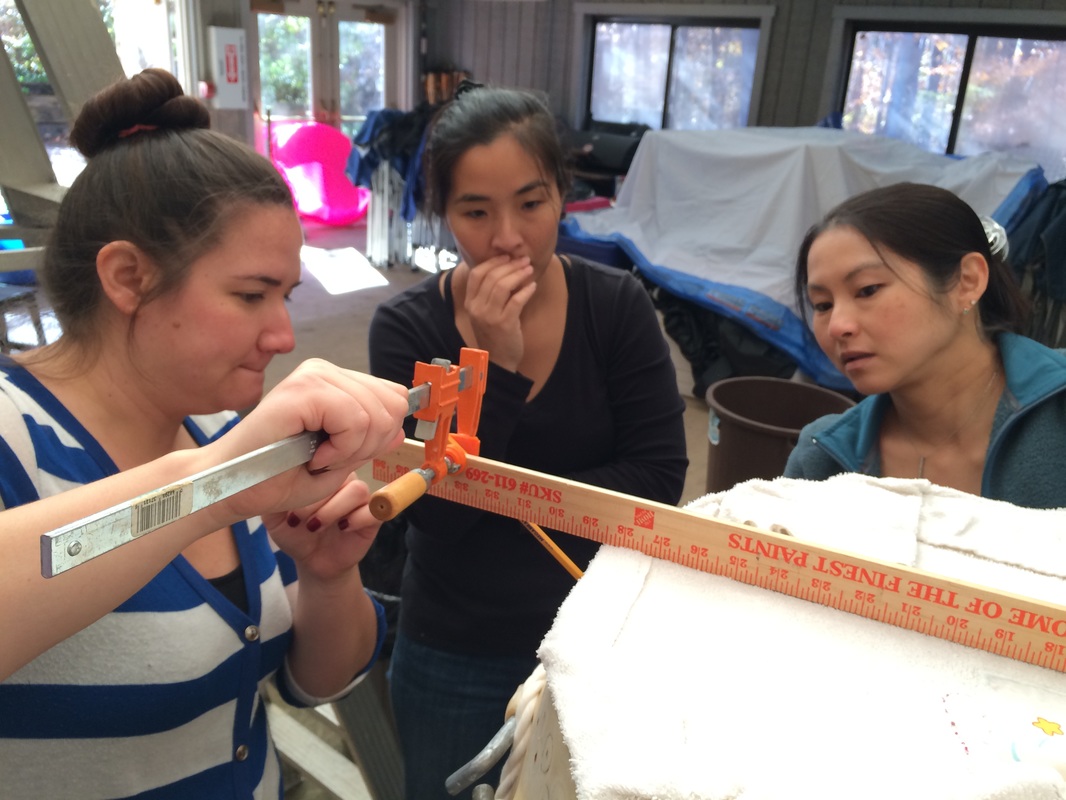
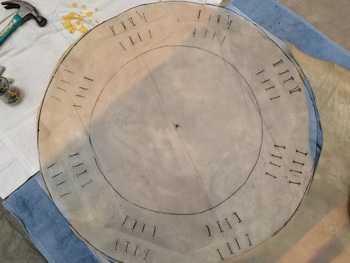
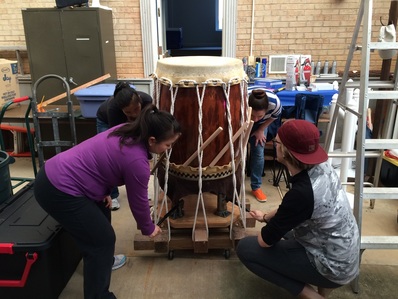 To start the stretching process, we increased the tension on the ropes by twisting in hardwood dowels that had been sanded smooth. Then, it was time to put even more pressure using four car jacks underneath the stand. Each pump of the car jack pushes the drum up into the hide, creating more tension on the rope and force on the mimi so the hide can stretch down. Everyone pumped with the same number of pumps at the same time to provide an even pull on the hide. As you can imagine, the car jacks put a lot of tension on the mimi. The amount of force necessary to getting the drum hide stretched tightly enough is really quite remarkable. 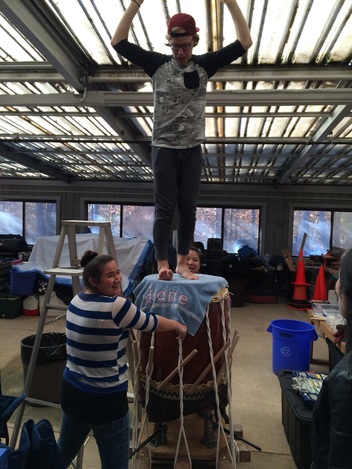 Now comes the surprising part – we stood on the drum and massaged it with our bare feet! Feet sense where the hide is thicker and needs more stretching. You can step more on the thicker sections, and advise the group which ropes to pull tighter by pumping specific car jacks. Luckily, we were doing this work in a room with rafters which you can hold on to while standing on the drum. After each stretch and foot massage, we listened to the drum head to see if we needed to tighten the car jacks more, checked to make sure the mimi and ropes were holding, and kept the top of the head damp and pliable by pouring water on towels. Finally, when the tone of the drum head went up instead of down, we moved on to the next step where we secured the hide in its newly stretched position. We marked where the new byo, or tacks, would go with a large, compass made from a yardstick, clamp, and pencil. The makeshift compass wasn’t the most precise instrument in the world, and would sometimes slip as we were trying to scoot around the drum. But it was much better than marking freehand, and we did our best using our MacGyver-ed compass. We made some final adjustments by eye so the line marking the first row of byo and the distance between each byo would be fairly even.
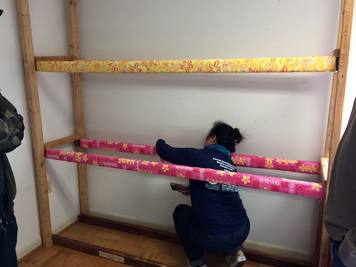
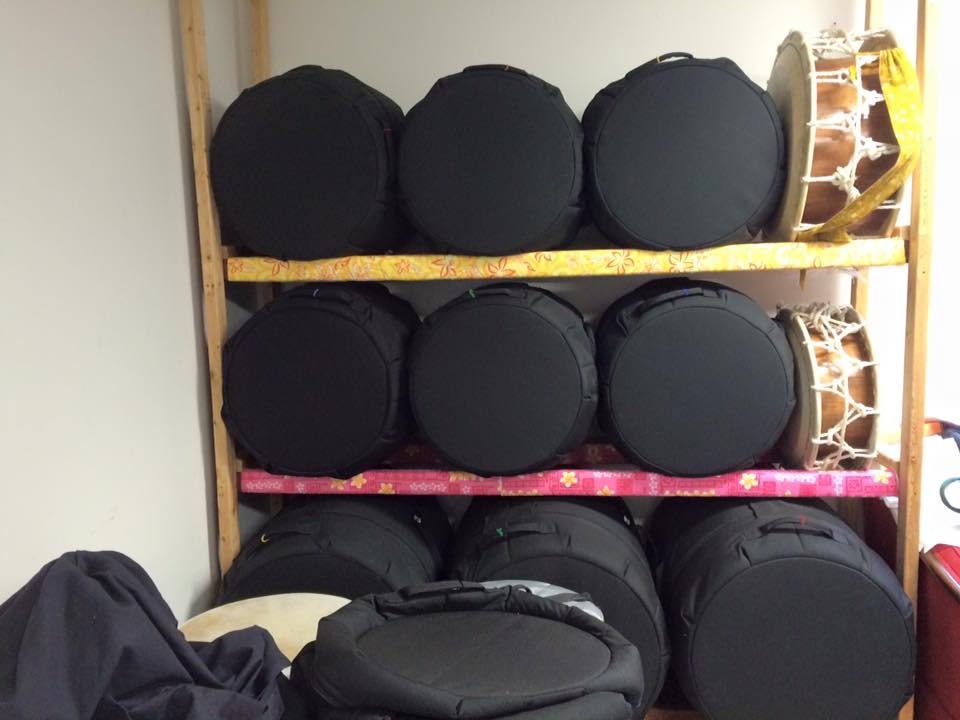
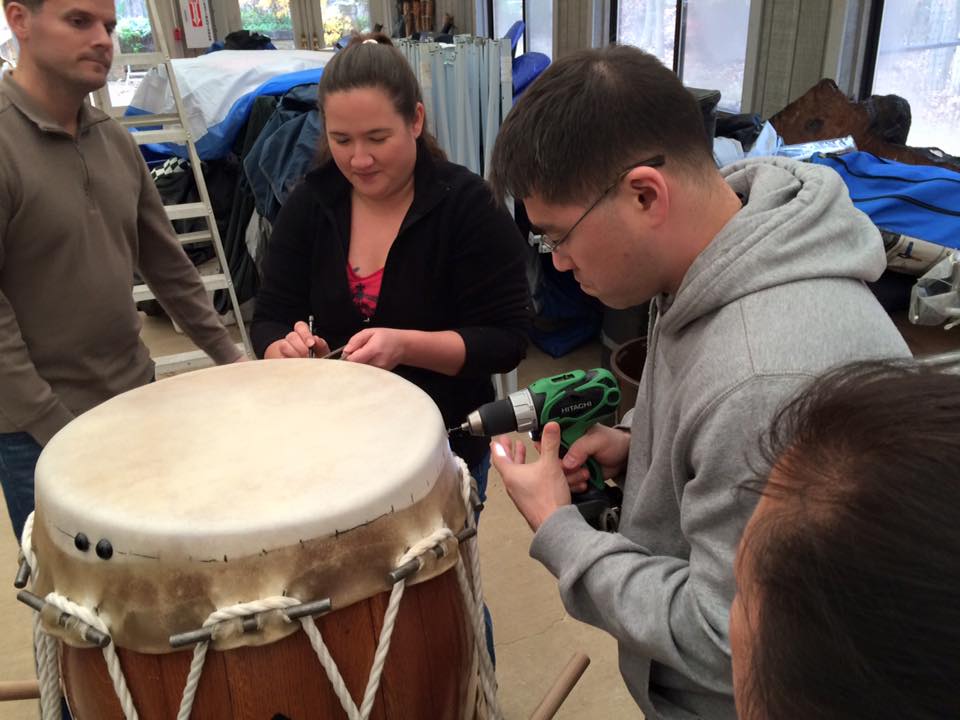
 Spending the time to mark the locations of the byo as evenly as we could didn’t necessarily mean the the pilot holes we drilled ended up where we intended. Despite our best efforts, the drill tip sometimes bounced in a little to the right or a little to the left. Sometimes the drill went in smoothly and sometimes there was more resistance in the wood and made the drill go in at an angle. When we first started tapping in the byo in, we were nervous and tentative. This caused the byo to go in at an angle and sometimes break off as we tried to fix it. As we got practice and more confident, we could tap them in with three swift hits. We finally got into the rhythm of drilling and hammering. By the time we put in the second row, all the little imperfections --including the stain marks from the old byo we were trying to scrub off at the very beginning-- were not a big deal any more. The re-stretching process for the odaiko head lasted until the evening, but with a lot of teamwork it turned out well and the head sounds wonderful! We are not taiko-building professionals, so our drums do not have the beautiful craftsmanship of a professionally made taiko. But all the flaws and imperfections in each of our drums have a story and make them very endearing to us. When we make and maintain our own drums, it reminds us of the impermanent nature of our drums (like the hide becoming loose or developing a hole) and all the interdependencies that allow us to have a drum to play (like the tree and cow and metal that make up the drum and the teamwork needed to create it). These reminders and reflections deepen our appreciation for our instruments and each other. What We Did While the Hide Was StretchingStretching drum heads is a practice of hurry up and wait. We did other great maintenance projects in the waiting times. For one project, we moved our drum storage shelves from one part of the Ekoji Buddhist Temple to another that was better suited. We added padded Hawaiian-print fabric to protect the drums when we put them on the shelves.
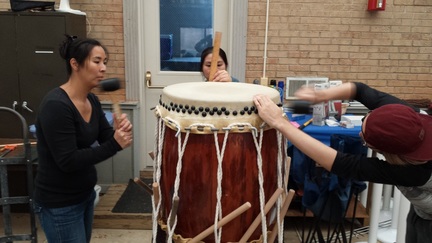
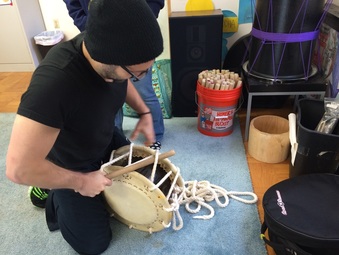
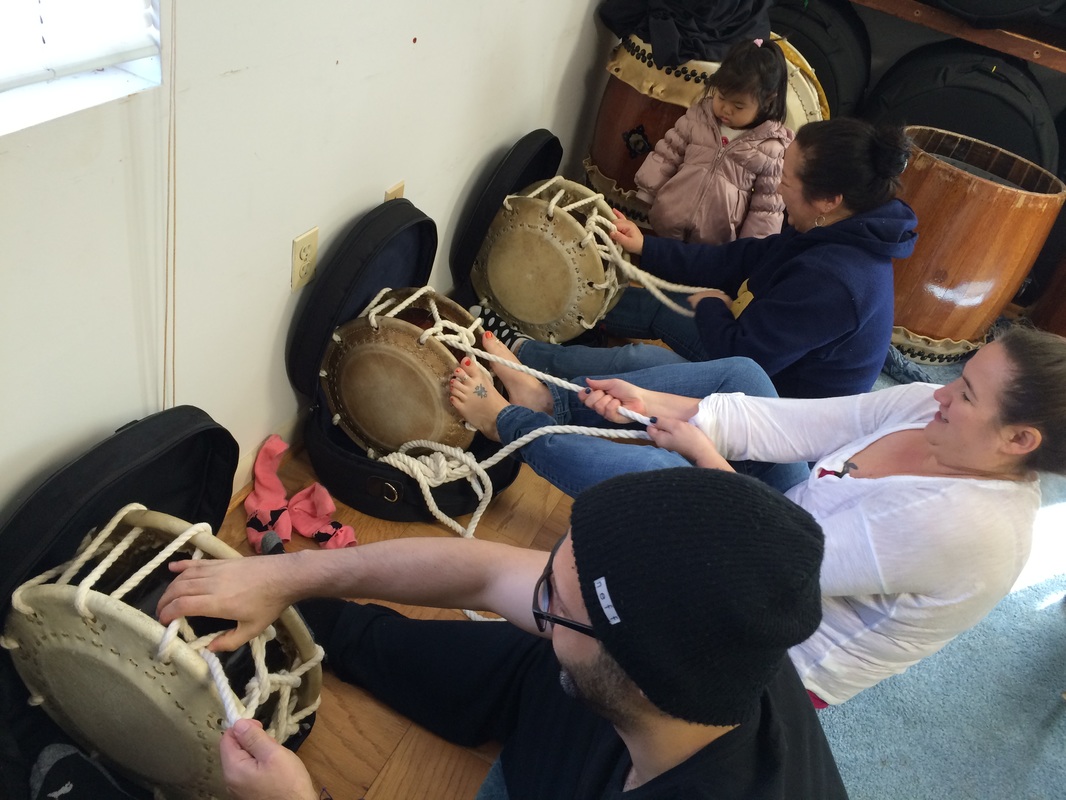
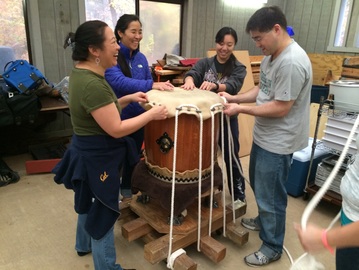
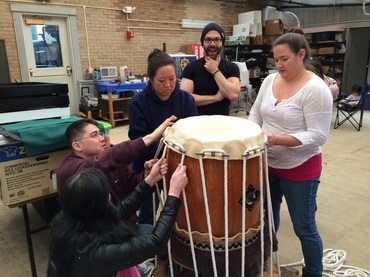
We tightened our shime daiko, or the drums tied with ropes. We use a bachi to pull on the ropes. Dee says bare feet are the best to hold the drum while you pull the rope. Emily does double duty – tightening shime and entertaining our smallest re-heading team member.
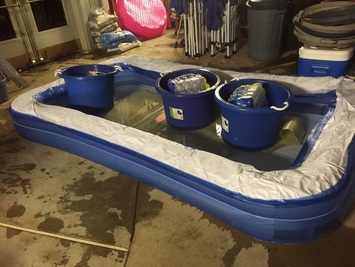
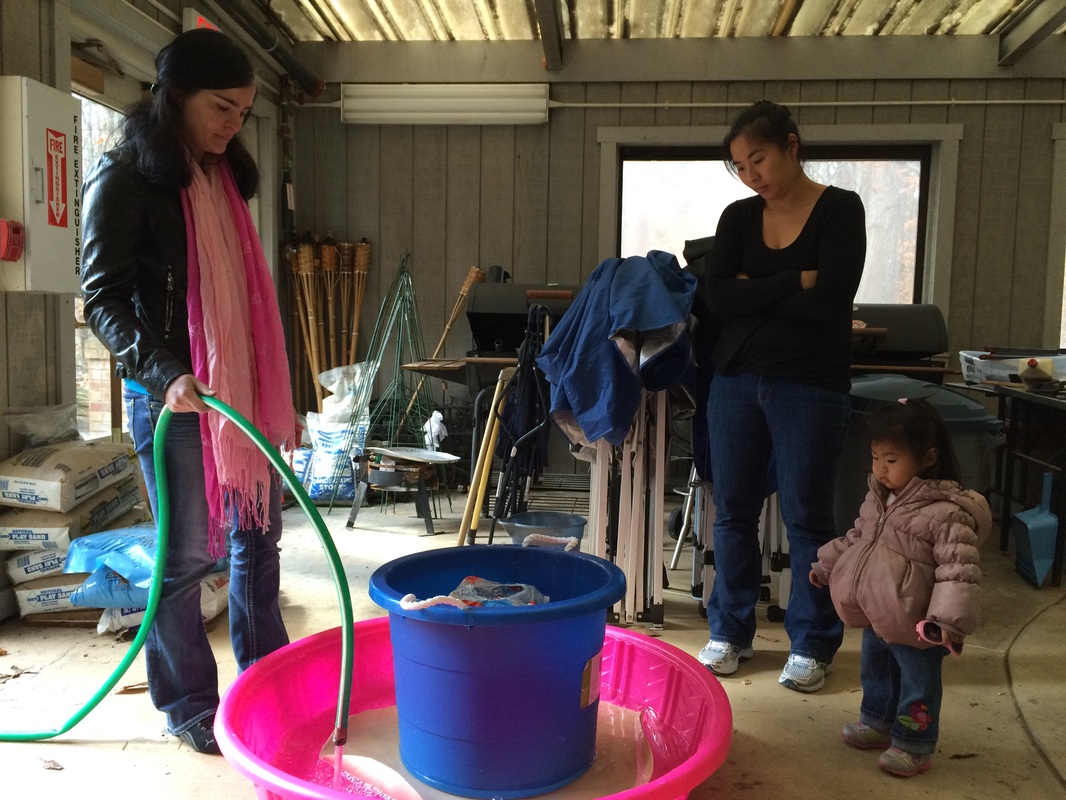
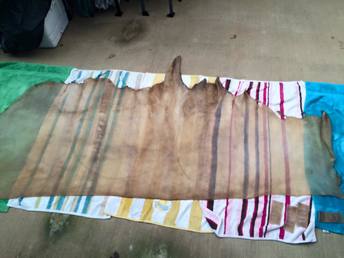
This fall, Nen Daiko undertook a drum maintenance project. This involved one of our chu-daiko, or medium-sized drum, and one of our o-daiko, or large drum. This blog is about our chu. This project took place over six weeks - many thanks to our hard-working Nen Daiko members and apprentices. To start, we soaked the cow hides to soften them. We tried to soak them in a baby swimming pool, but quickly realized we needed a bigger pool. Luckily, Dee had a long rectangular one. We weighed down the hide with buckets filled with water bottles.
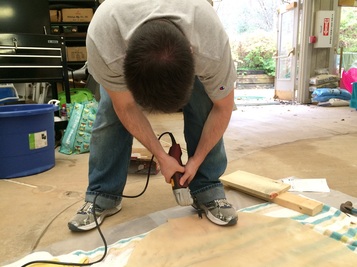
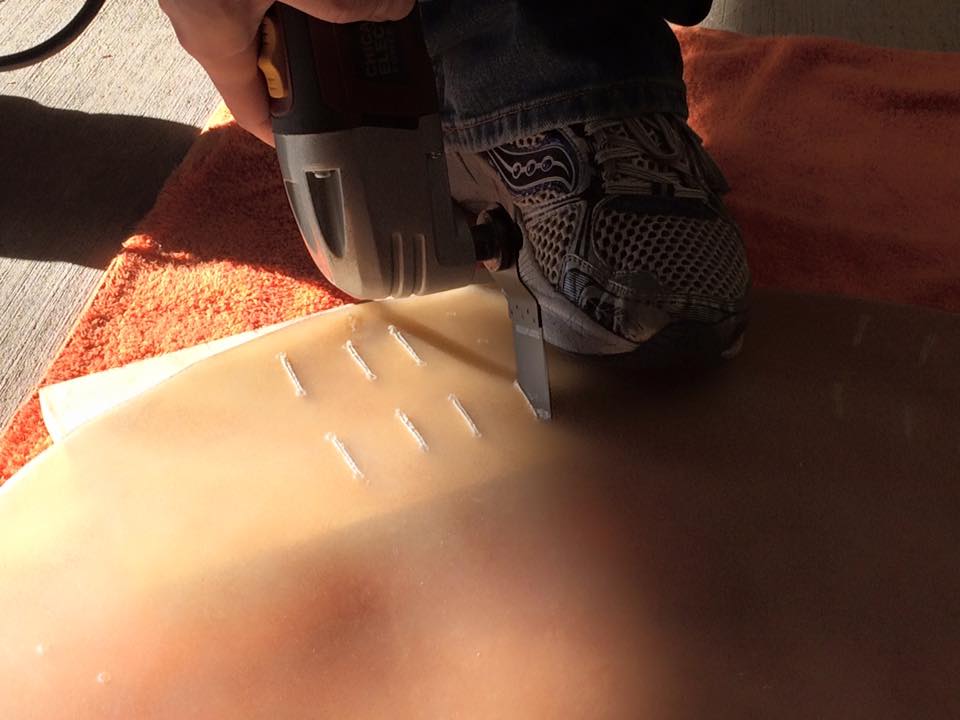
Once the hide was soft, we cut out two heads from it using the plastic templates we had prepared. The most challenging part of this step was to find something that would write on the damp hide. We tried chalk, a crayon, and a pencil, until Lisa pulled out an eyeliner from her purse. That did the trick. We used leather scissors and a Dremel tool to cut through the hide and to cut slots around the edges.
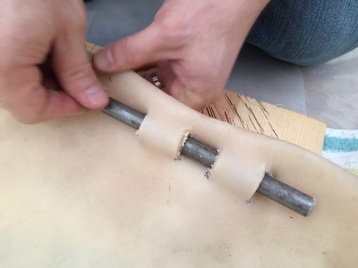
Based on our previous reheading experiences, we cut four slots so we could fold over the edge of the hide to double the layer where we wove the metal rods through. This is what forms the “mimi” or the “ears” of the drum hide, and allows us to stretch the hide. You will see why a strong mimi is very important in a minute!
We tied our rope to the base of the stretching stand. We looped it over the mimi and then down under the stand. We did this loosely at first until we were sure the hide was centered on the drum and the handles on the body, or “kan,” did not interfere with the ropes.
 We tightened the rope by hand, then used wooden dowels that had been sanded very smooth to tighten the ropes further. You put the dowels over one rope and under then other, then give it a twist. You can see the ropes put a lot of force on the mimi as we start to stretch the hide. 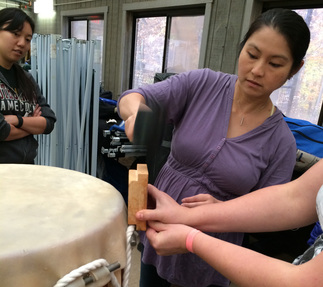 Knocking on the mimi to even out the stretch Knocking on the mimi to even out the stretch We twisted the dowels a few more times to make it tighter. We used a rounded block of wood to knock sections of the hide down in spots where it seemed uneven. But with each tightening, more white marks appeared. This hide showed stress marks far too easily. Its texture was waxy and its thickness uneven. We held out hope it would be okay. 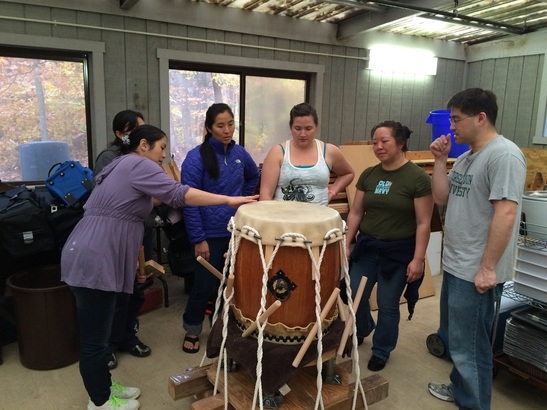 Once the hide had dried in this shape for a few days, we took it off the drum and let it harden further before the next step. We tried to get the mimi and the outer rim where we were seeing stress marks really dry, while keeping the center more pliable. After the mimi had dried, it was time to stretch it. But bad news. As we worked with the head, it tore along the mimi. The head was not going to work. Stretching Hide #2We had cut two drum heads from our hide, so we soaked the second one. Our smallest taiko re-heading team member wanted to climb into the pool with the soaking drum head, but restrained herself. You can see, everyone is a bit sad at this point.
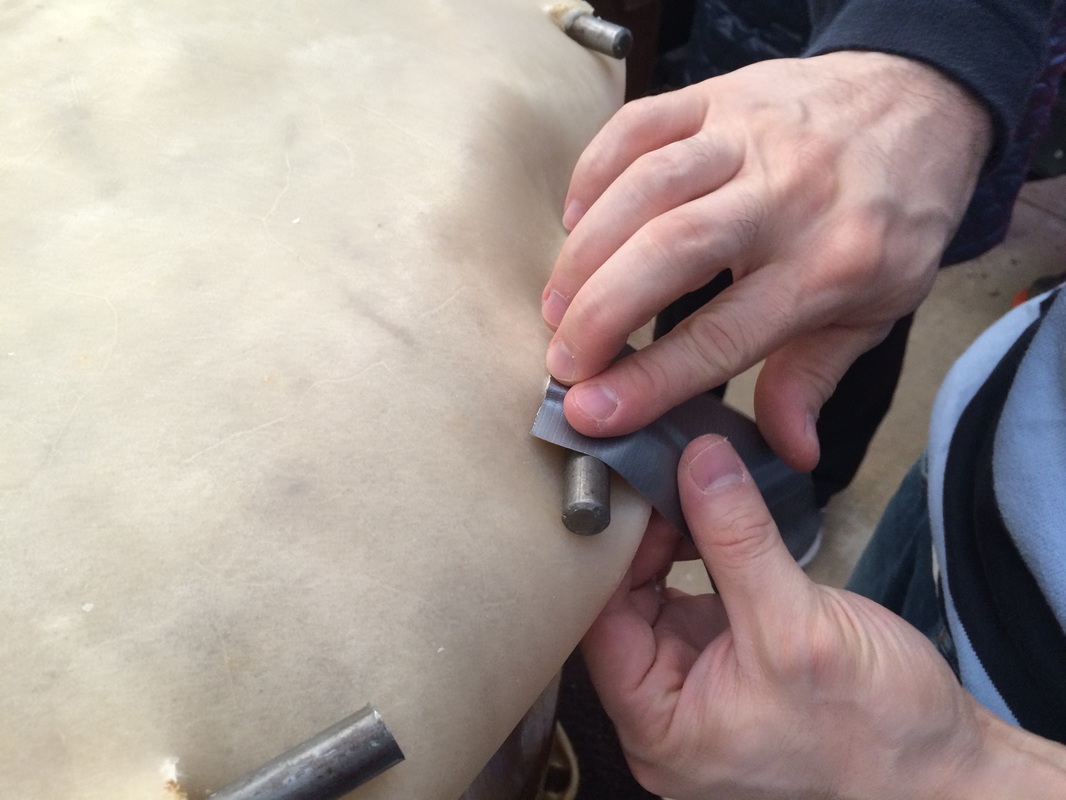
After soaking for a few days, we did the same process with the second head. Unfortunately, it did not fare any better. At one point we even resorted to duct tape on a weak part, but in the end, mimi ripped again.
After a series of stretching activities which included stretching the hide further using car jacks, we started to see scary ripping again, so we had to quickly move to the tacking step to secure the hide to the body. This entailed marking the location of the tacks, or byo, pre-drilling holes, and hammering the byo in --all under pressure! At a particularly stressful moment, a piece of drill bit cracked off and got stuck in the wood, but we continued with the process.
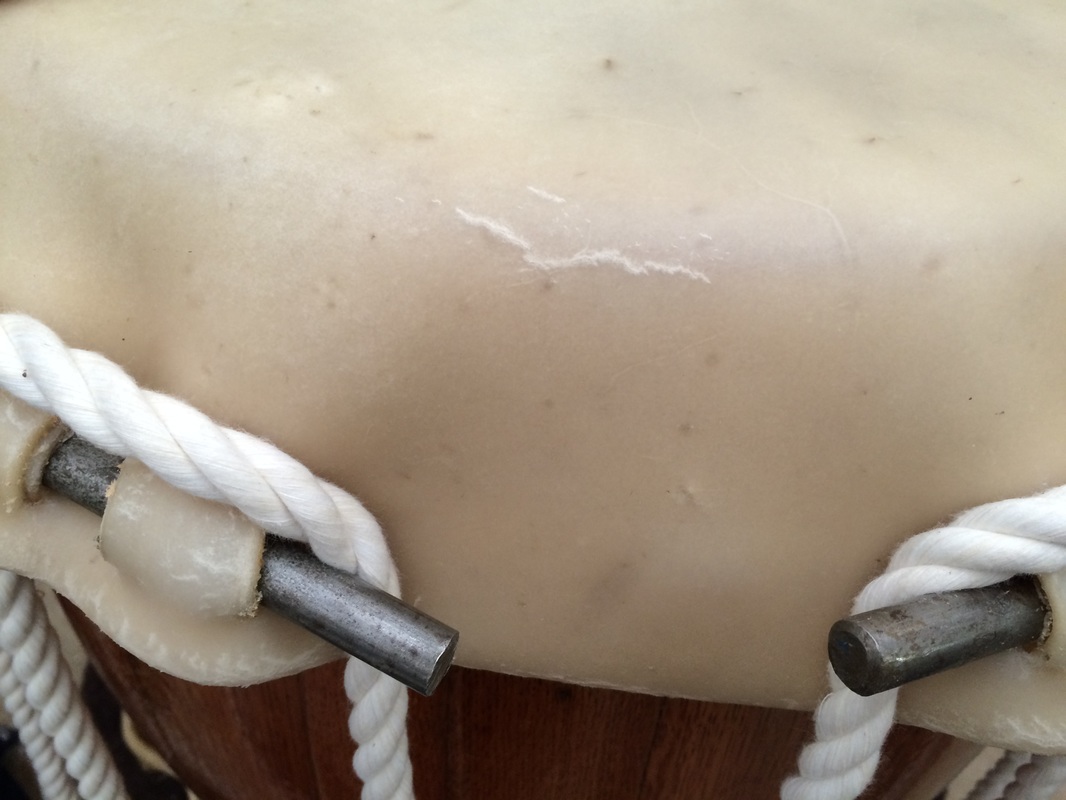
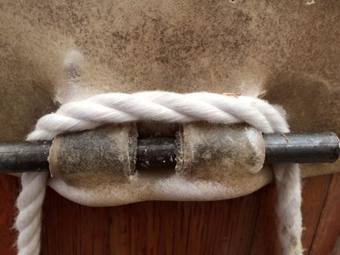
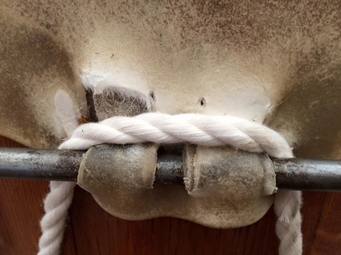
A lot of the stress was due to the fact that despite our best efforts, some mimi were not tolerating the force needed to stretch the hide and were starting to tear. Here’s a comparison of a healthy and unhealthy mimi:
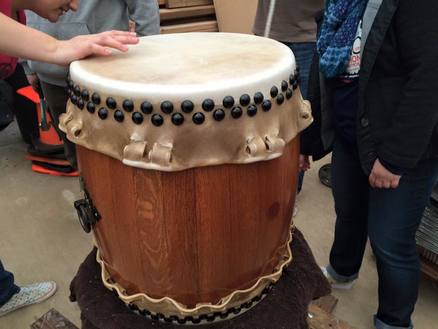 You can imagine everyone’s relief when we finished with a beautiful and wonderful-sounding drum! We love you chu, despite all the stress you gave us! We look forward to hearing your sounds at our upcoming performances!
This was a big project for Nen Daiko. Extra thanks to Brenda for all her hard work ordering the cow hides, and to the more experienced members of Nen Daiko for teaching all of us the skills to maintain our equipment. Thank you to Mark H. Rooney for sharing his tips about drum reheading in the past and for taking the time to brainstorm possible solutions with us when things were not working well during the first two hides. Thank you also to Stanley Kaneshiki from Hoh Daiko, who has always been so helpful and patient over many years as different Nen Daiko members have tried to learn his drum-making techniques. We are pleased we now have two drums with beautiful new heads and the many other maintenance projects are done. For more details about our other drum maintenance projects, check out this blog about putting a new head on our o-daiko or big drum (which was a much less stressful project). Nen Daiko Members Collaborate on Taiko/Rock Band Piece Inspired by Led Zeppelin's Kashmir12/14/2015 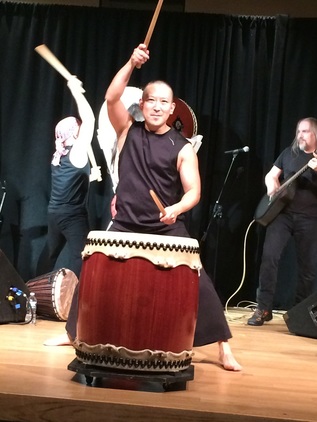 On October 24, local taiko instructor Mark H. Rooney hosted a show called #randomactsoftaiko at the Takoma Park Community Center. The concert featured collaborations between taiko players and non-taiko players to make fascinating results. Two current Nen Daiko members, Greg and Lisa Nakamura, played in the show. A past Nen Daiko member, Hanae Coutrier, also played. Here’s Greg’s thoughts about the opportunity. *** Mark invited us to help out with the concert. Our main contribution was a collaboration with a rock group he has been working with named ilyAIMY, which is an acronym for “I love you and I miss you.” The piece was Kashmir based off the Led Zeppelin song. It was one of Mark’s first compositions he had written for taiko many years ago. Even when he had written it back in the day, he had a dream of playing it with a rock band. This was the first time this dream would be realized. 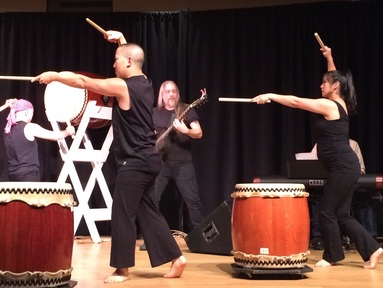 How did the song change when performing with a rock band versus performing it as a stand-alone taiko piece? Originally when Mark wrote the taiko version of Kashmir, the tempo was a little slower. Playing with the band took the tempo up a bit. Also, Mark had to change some of the sequences of the patterns he had composed. The song Kashmir has very distinctive rhythms that you HAVE to play. But when playing with the band, you can’t play exactly the same thing as the band or it gets boring. If the band was playing the signature rhythms, Mark would have the taiko players play a counterpoint to that. Towards the end of the song, we were all playing the signature rhythms, to emphasize them. 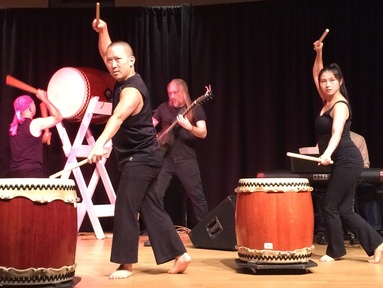 How did the choreography change when working with the rock band? Most of the choreography was created by Mark. There was one section where he said, “You all have five minutes to experiment. Come up with something for 8 counts.” We all came up with several ideas and shared it with the group. Then Mark used them as the building blocks for the final choreography. In some parts of the song, Mark did an odaiko (large drum) solo. During those parts, he wanted less sound from the chu (medium-sized) drums that we were playing. So those parts had the most choreography for us, to keep it interesting for the audience. What did you learn from playing taiko with a rock band? You have to keep an ear out for the band. You can’t cover the vocalist or the band. When taiko players play alone, the person playing the base tempo or ji may slightly adjust to the group. When you are playing with a rock band, we relied on the drummer from the rock band to keep the ji. Their drummer was really steady so it was great. Also, at the performance, the vocalist Heather, was moving around the stage. We had to stay aware of her location especially when we were moving our bachi in large movements. Her movement around the stage helped create the rock and roll vibe Mark wanted. It was energizing to see them rocking out, much better than playing to a recording of the song. What did you learn from this collaboration? It was a good experience learning a song that was written by somebody else. I enjoyed learning about Mark’s particular way of composing. One example of his style was his use of nicknames for different rhythmic lines. He said it was the most characteristic of how he composes. It was different than how I compose. Experiencing new ways of composing helps you get out of a rut. I come up with different rhythms but I don’t name them. My compositions tend to be more melodically driven – based on melodies, not just rhythms. Thanks to Mark and ilyAIMY for the opportunity. It was my first time playing taiko with a rock band and I would love to do it again! Check out this video of the final result: |
Archives
May 2024
Categories
All
|

 RSS Feed