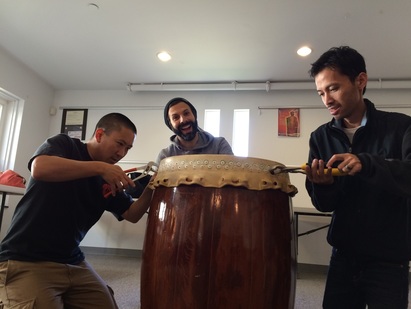
 Did you know the word “taiko” means drum in Japanese? Building a taiko is a huge job – making the wooden shell and stretching cow hides on either end. At Nen Daiko, we owe much gratitude to the drummers who started our group and built the drums. In the world of taiko, we believe the drums retain the energy of all the people who drum on them. So the drums represent the more than 30 people who have been Nen Daiko members since 1994. Now it is our job to replace the cow hides when they wear out. This part of the drum is called the head, so we call this “reheading the taiko.” This is a multi-week project. It’s not a project we can do all at one time, because the hides need to soak and stretch over many days. Ordering the Cow Hides Each year, Nen Daiko members evaluate the drums. This year, we determined that our black chu and our red odaiko each needed one head replaced. All our drums are identified by a color because every drum has its own qualities, and we want to get the right drum to the right spot on stage. The black chu had an actual hole through the head. The red odaiko head was still solid, but its sound had become dull – more of a “thud” than a nice sharp “don.” Probably it had loosened up over time and was not stretched in an optimal way anymore. Brenda ordered two large cow hides from a company in Washington state. They cost about $150 each. They arrived dried and rolled up in a large package, like two giant taquitos. Lisa said that if they have a stripe down the middle, that is where the cow’s spine was located, and usually the strongest part of the hide. Removing Old Taiko Heads 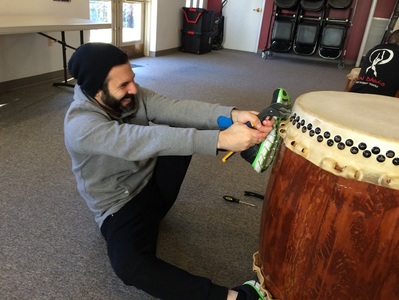 One team pulled out all the byou, or those large black tacks that hold on the drum head. The byou were chipped from when we tap them with our bachi or drum sticks during performance. Greg said some groups reuse the byou by painting them, because they are expensive (about 25 cents each). But we worried that pulling them out of the drum weakened the connection between the round metal part and shank of the tack. We decided to start fresh with new tacks. Many of the round pieces popped off anyhow as we removed them. 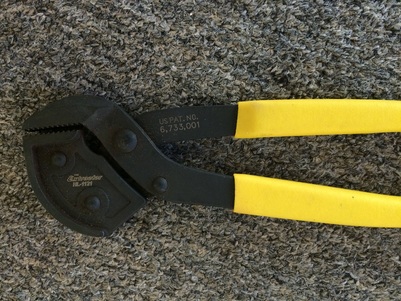 One useful tool was the EXTRACTOR (this should be read with a scary voice). In cases where the round part cracks off, it clamps on to the shank part and rocks, making it easy to pull out. 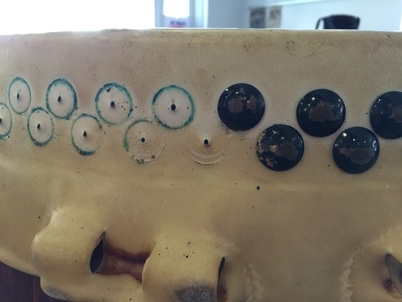 Check out the cool green circles that were under the byou on the red odaiko! 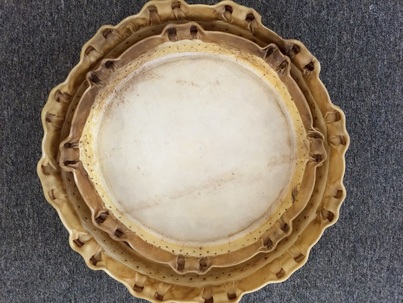 When the heads were removed, we talked about what we could do with them. It seems sad to throw them away when there have been so many great performances on them. Greg said that a previous Nen Daiko member named Brig had the symbol for “Nen” painted on an old head, and the whole group signed it. Then he put a light behind it and made a light. They also might be great to use in educational sessions, to pass around so the students can see how they feel. What ideas do you have to reuse the old taiko heads? The Big Reveal – Inside the Taiko 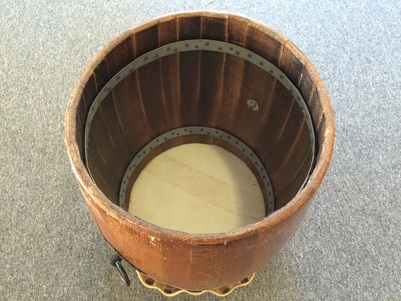 Now for a sight that is only viewed once a decade – the inside of the black chu and the red odaiko! The black chu had two metal stabilizing circles inside. Greg said that means it is an older drum – how Nen Daiko built drums at first.. You can see the stripe on the bottom head, where the cow’s spine was located. 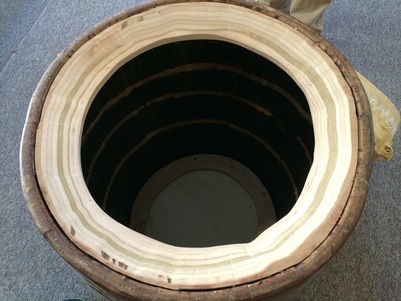 Here is the inside of the red odaiko. It is stabilized not by metal circles, but by this large wooden circle. It appears to be 6-7 pieces of wood, glued together, then cut in a circle. Then it was sanded down on a diagonal so it would not touch the head when hit. Someone put a lot of effort into creating this. 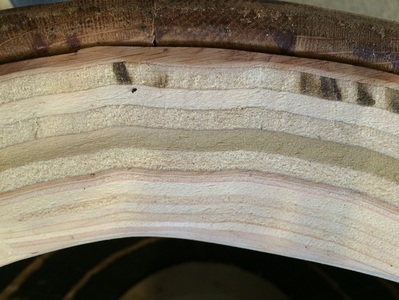 Look how beautiful the layers look as they were sanded on a diagonal. Filling the Byou Holes 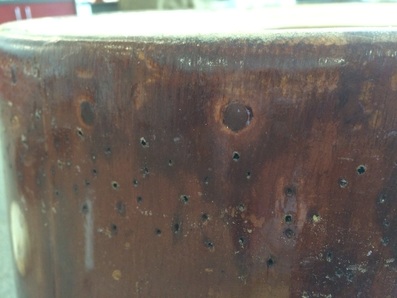 Around the drum rim were holes from the byou. We needed to fill them with toothpicks. When we put the new head on the taiko, if a tack goes in the exact same spot, it might be loose. But if it shares the hole with a toothpick, it will be tight. 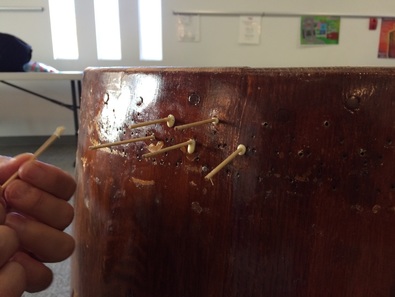 We dipped the round toothpicks into wood glue, and pushed them into each hole. We used a tool to lightly tap them into the hole. We wiped excess glue off with a tissue. 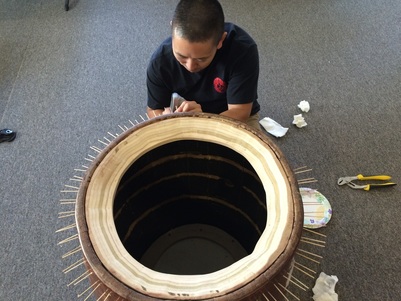 The drums started to look like porcupines. 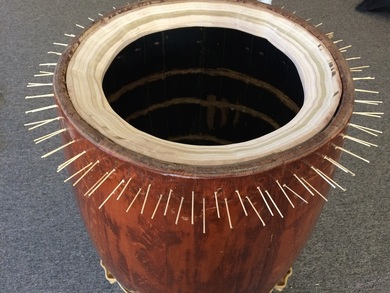 In this photo, you can see that inside the red odaiko, there are horizontal stripes carved into the wood. Many professional taiko building companies have studied how carving inside the taiko can impact the sound it makes. Over centuries of taiko building, they have determined patterns. The most immediate benefit of carving is to reduce the weight of the taiko, which are quite heavy to lift! Preparing to Cut the Cow Hide Other Nen Daiko members calculated how to cut the cow hides by drawing templates on clear plastic. The hides are so expensive, so these calculations must be done very carefully. 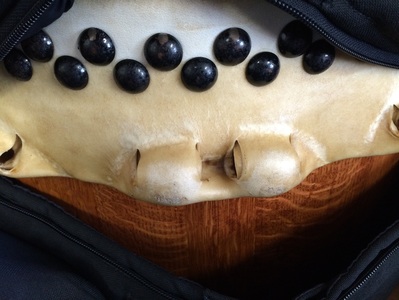 The team looked at drums that Nen Daiko had re-headed in the past. How could we improve the process? Here’s an example of a taiko head that looks great. Those lumps under the byou are called “mimi” or ears. We will thread a metal rod through them, and pull on them with ropes to stretch the hide. To make them strong enough to handle the pressure, the mimi are double-layered by folding over the hide. The holes are cut to a certain size to ensure the best stretching experience without ripping the hide. 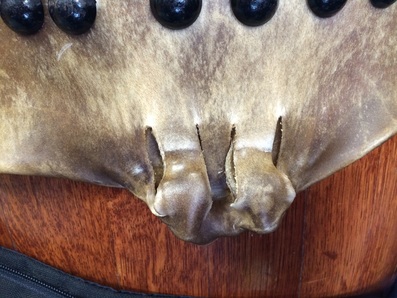 Here’s a different drum. When this was re-headed, the mimi holes were cut much larger, and the mimi were folded differently. You can see those white lines where it looked like the mimi might tear. We want to avoid that situation because we want a full stretched head, but not a torn mimi.  This photo summarizes the Nen Daiko apprentice experience. Apprentices do the work while members boss them around. Just kidding!! Kudos to Brant and Chris for doing the measuring and math to make our templates. Preparing the Stretching Stand 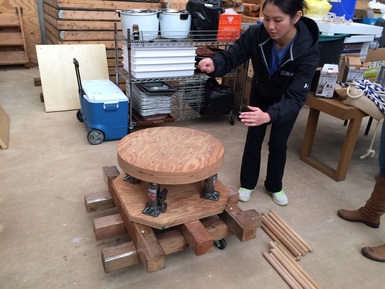 Another team dug out the big stretching stand and set it up for the taiko. This is where the taiko will sit while we stretch the hide using a system of car jacks, ropes and metal rods. Those wooden bachi or sticks are used to twist the ropes tighter as the hides stretch. Cutting Off the Toothpicks 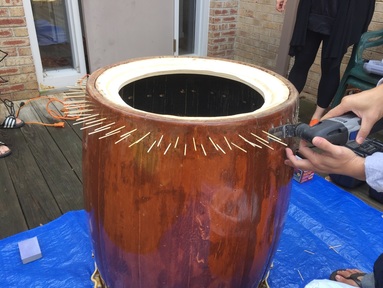 The next day, after the glue was dry on the toothpicks, we cut them off with a Dremel and similar tools. We also sanded them down.
So that was just the first three hours of this project! Get ready for updates as the re-heading continues!
0 Comments
|
Archives
May 2024
Categories
All
|
 RSS Feed